THANK YOU
for purchasing the Subaru FlexArm Phone Mount from CravenSpeed. This product is made from the highest grade materials, and is guaranteed to be free from defects.
You can buy our
CravenSpeed Gemini Phone Mount for Subaru here
Parts Included:
-
1x FlexArm Phone Mount Assembly
-
3 ea 4-40 Stainless Button Head Screws
-
1 set Adhesive Metal Plates
Tools Required:
-
1/16 Hex Wrench Driver
-
3/16 Hex Wrench Driver
-
Stubby Phillips Screwdriver
-
Small Flat-head Screwdriver
-
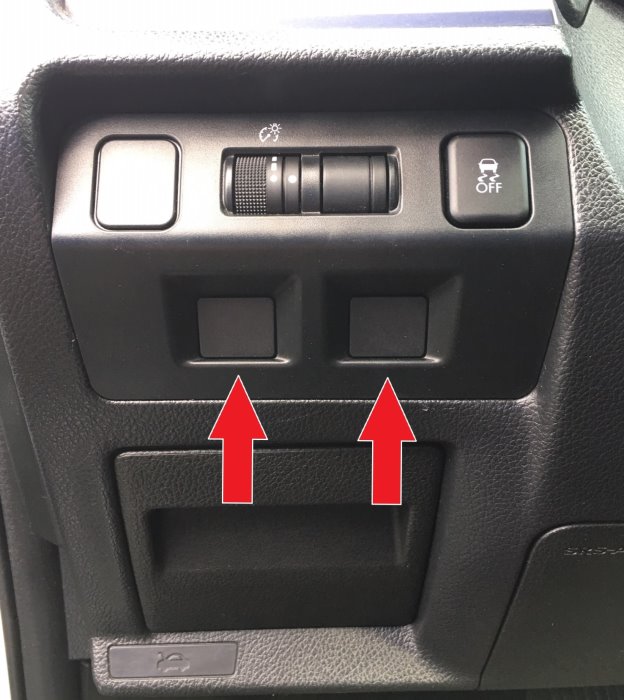
For the 2011-16 Subarus, we’ll be installing this phone mount into the lower left side instrument panel where your dimmer dial is located. Provided that your Subaru isn’t fitted with every option from the factory, you should have at least one of these switch covers to choose from.
-
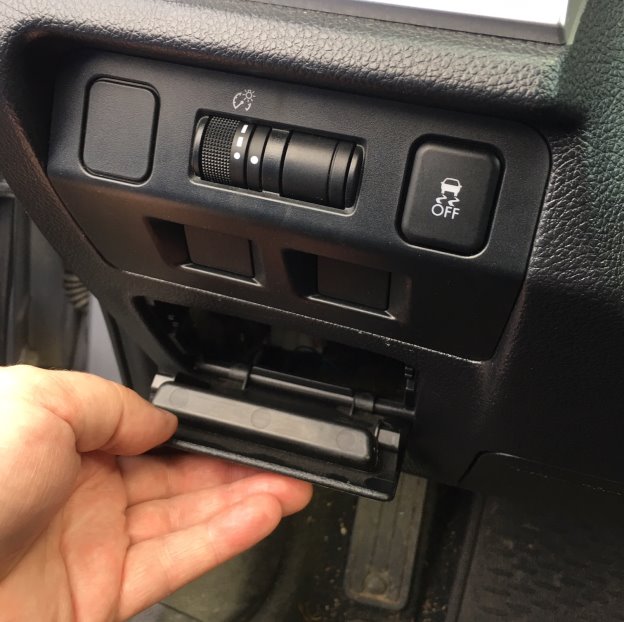
Begin by pulling the lower access panel off. This panel pivots along the lower edge.
-
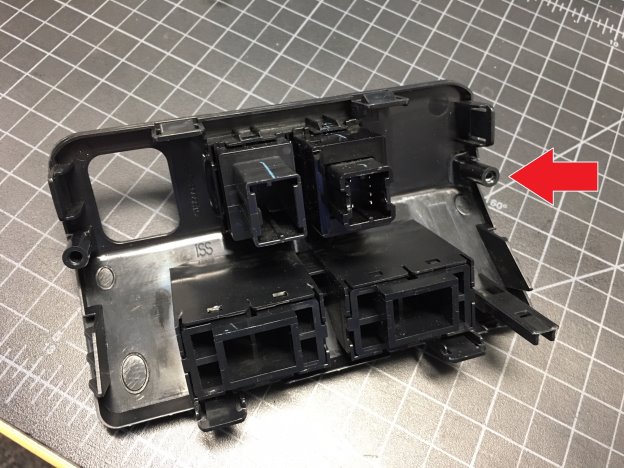
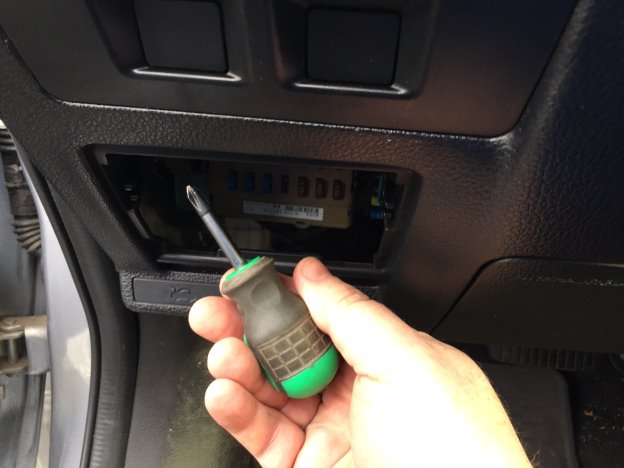
Now we’ll remove the switch panel. Although this panel clips into the dash, it also has a single phillips screw up on the inside left, just behind the ‘bend’ in the panel. Feel around behind the switch panel with your fingers to locate this screw, then use your stubby phillips head screwdriver to remove it. (Image below shows its location)
-
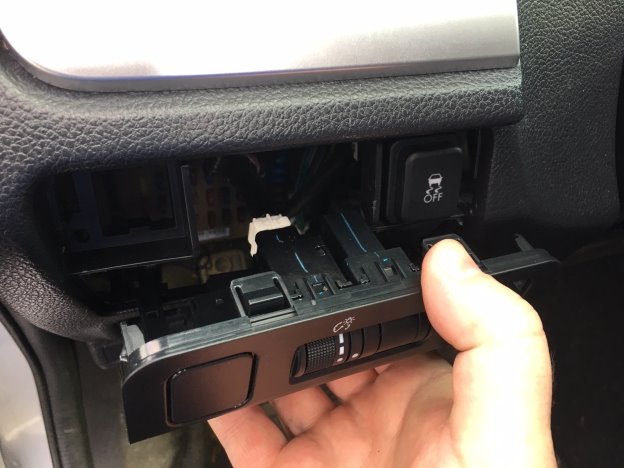
Once this screw has been removed, reach up behind the dash and push the switch panel out from the inside. You can assist in the process by prying around the outside with a trim panel removal tool.
-
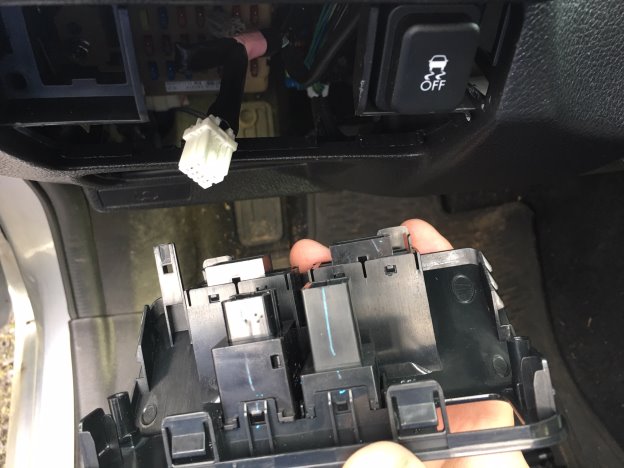
You’ll have a wiring connector plug or two to deal with. Disconnect them and the switch panel should now be free of the dash.
-
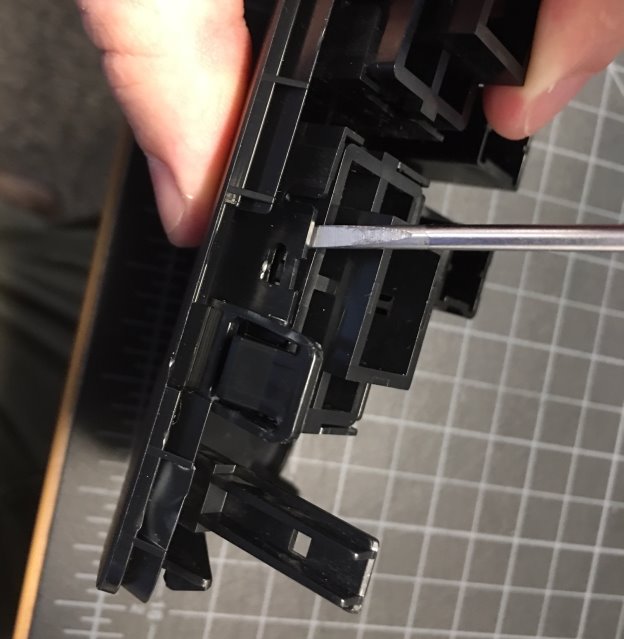
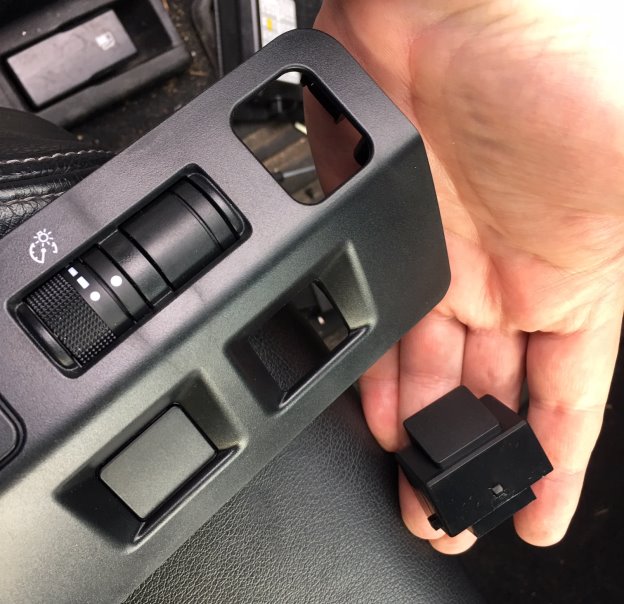
Flip the switch panel around so you’re looking at the backside. Determine which cover you’re removing and use a small flat-head screwdriver to
gently
lift the locking tabs around the switch cover. Apply pressure to the switch cover from the frontside and when the tabs have released the cover should slide out the backside.
-
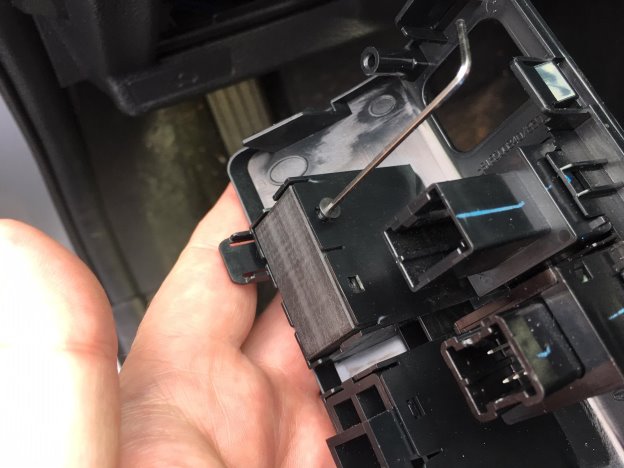
Take the CravenSpeed FlexArm Mount and place it into the desired switch cover receptacle with the front tab angled down. Using your 1/16 hex wrench, place the (3) included stainless button head screws through the locking tab holes, affixing the mount into place. There are two on one side and one on the opposite.
-
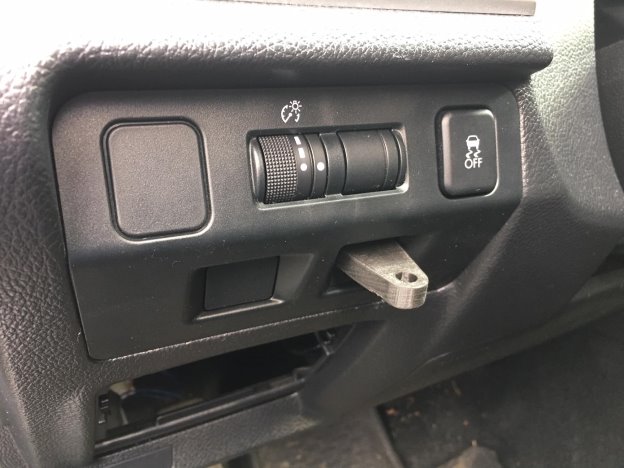
Plug your wiring back into the panel and reattach it to the dash.
-
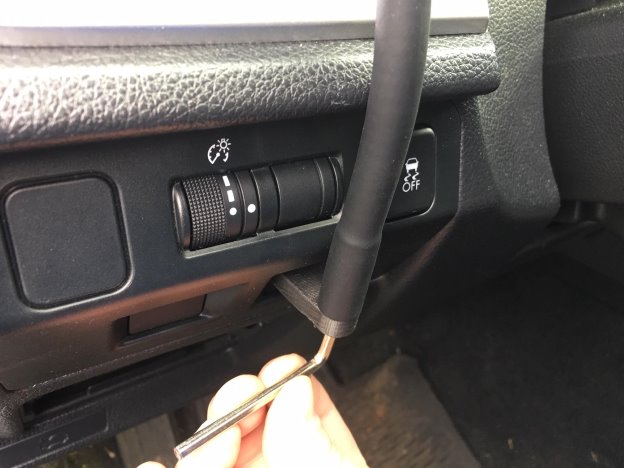
Set the FlexArm into place and use your 3/16 hex wrench to tighten the included ¼-20 stainless button head screw.
-
Bend the FlexArm into the position you require. Apply one of the included adhesive metal plates to the backside of your phone or phone case. If your phone case is not too thick, you may have good results applying it the inside of the case.
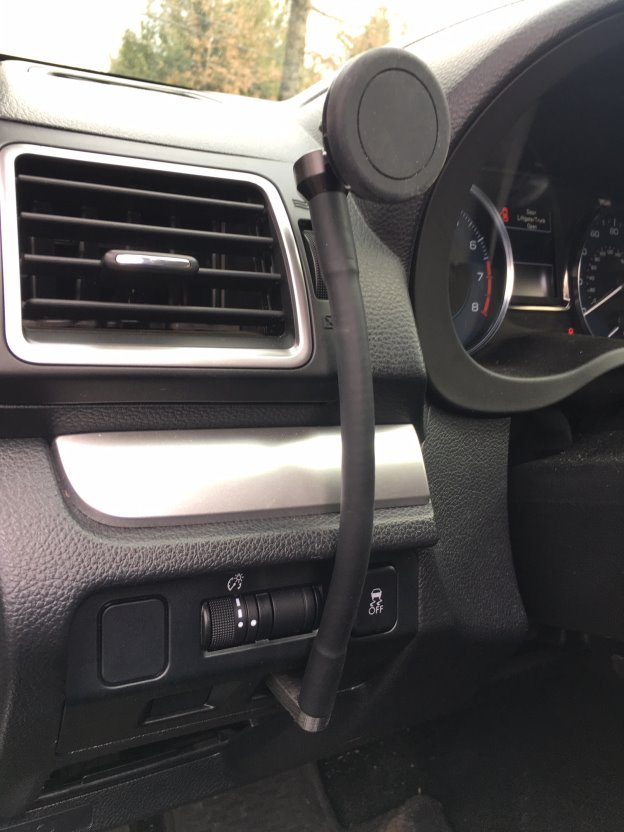
Congratulations… your install is complete! Stand back and admire your handiwork!


