THANK YOU for purchasing the 2006 and Newer MX-5 Shift Knob from CravenSpeed. This product is made from the highest grade materials, and is guaranteed to be free from defects.
You can buy our CravenSpeed Shift Knob for NC/ND MX-5 Miata here
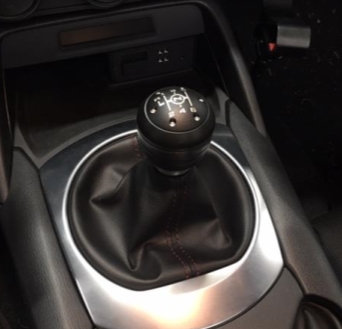
Parts Included:
- 1x Delrin Knob Body
- 1x Stainless Steel Core
- 1x Knob Cap
- 6 ea 2-56 SS Cap Screws
- 1x O-Ring
- 1x 5/64 Allen Key
Tools Required:
- Body Panel Removal Tool (Flat-bladed Screwdriver may be utilized with care)
NOTE: There are two options when installing this shift knob. Simply removing your factory shift knob and spinning this one on will result in a completely acceptable installation which will resemble the image below.
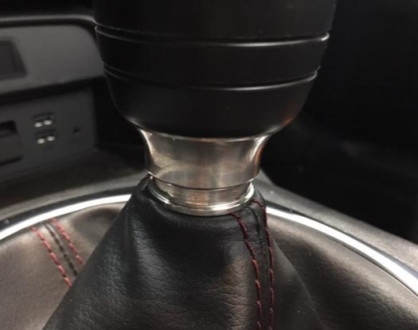
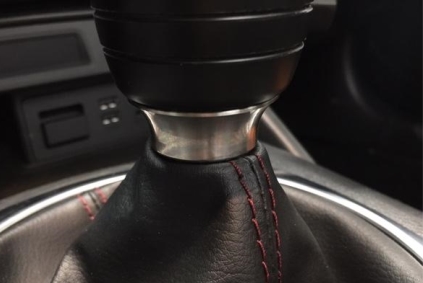
As shown in the image above, the Stainless Steel Core piece has a groove around its lower edge. This groove allows for setting the shift boot into place resulting in a cleaner appearance as shown here. It will require a slightly more involved installation process which will be covered as well.
Procedure
Let's get started
- Place the Stainless Steel Core piece over the shifter.
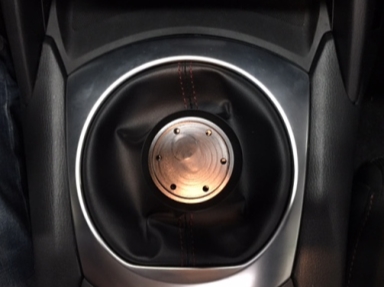
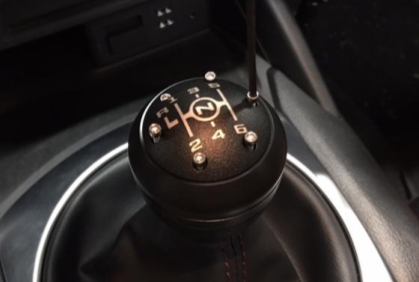
- Take the Delrin Knob Body and thread it onto the shift rod and tighten until snug. You’ll want the hole pattern on the top of the Delrin Knob Body to mirror the orientation of the image below.
- Align the holes of the inner Stainless Steel Core to the holes of the Delrin Knob Body and set the Knob Cap into place.
- Place each of the 6 Cap Head Screws into the Knob Cap and tighten with the included Hex Key. You’re done!
1. Remove the factory shift knob by unscrewing it in the normal fashion.
2. If you’ve decided upon the simple install, complete the following steps.
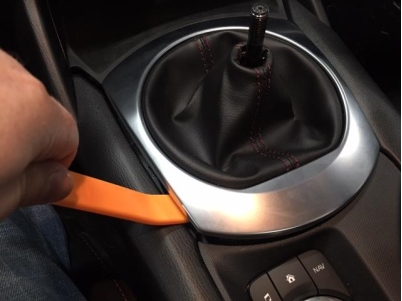
3. For the more involved installation, remove the Shifter Boot Trim Surround by loosening the left, right and rearward edges with a Body Panel Removal Tool (or flat-bladed screwdriver). Once you have the edges released, simply pivot off the front tabs and lift out. The shift boot should remain attached to the trim surround. If it has detached itself, simply snap the inner shift boot structure back into place on the underside of the trim surround.
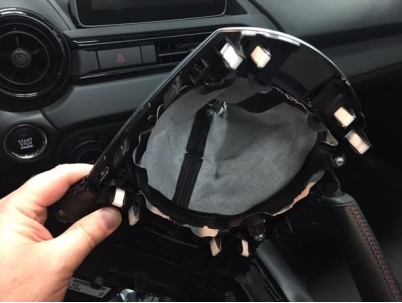
4. Flip the Shifter Trim Surround over and push the boot inside out so you can access the plastic ring glued to the end of the shift boot. Peel the triangle ends of the boot off the plastic ring.
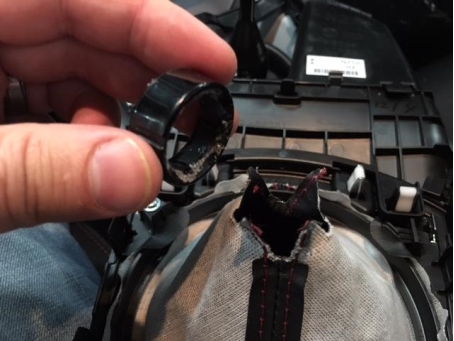
5. Place the Stainless Steel Core piece up through the inverted shift boot and utilizing the included o-ring, capture the tabs of the shift boot within the groove of the Stainless Steel Core piece.
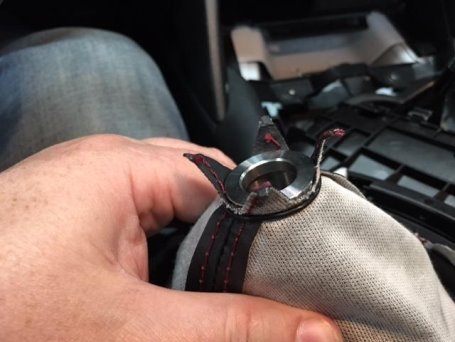
6. Flip the assembly over and place the Stainless Steel Core piece onto the shifter shaft. Insert the front tabs of the Shifter Trim Surround back onto the center console and then ensure all remaining tabs snap in and engage completely.
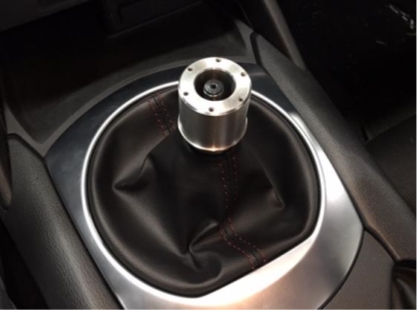
7. Place the Delrin Knob Body over the Stainless Steel Core piece and begin threading it onto the shift rod and tighten until snug. You’ll want the hole pattern on the top of the Delrin Knob Body to mirror the orientation of the image below.

8. Align the holes of the inner Stainless Steel Core to the holes of the Delrin Knob Body and set the Knob Cap into place. Place each of the 6 Cap Head Screws into the Knob Cap and tighten with the included Hex Key. You’re done!

NOTE: If you feel that the knob assembly could be a little tighter, simply remove the screws and Knob Cap, tighten the Delrin Knob Body to align with the previously shown hole orientation and replace the screws and cap.